
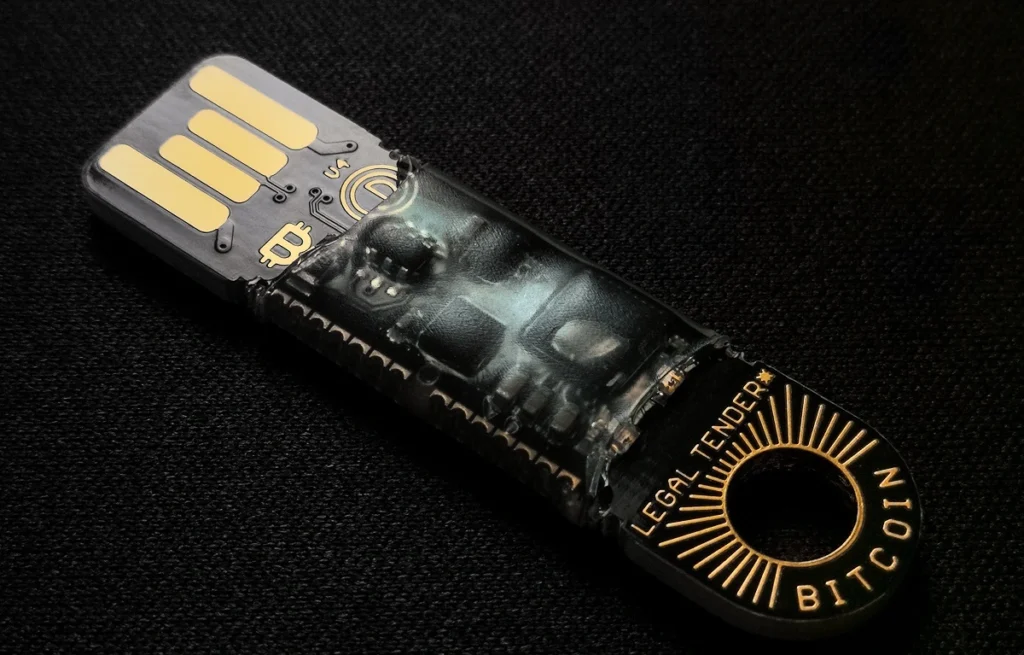
As you sit down at your laptop with your morning coffee, you notice an inconspicuous flash drive plugged in that wasn’t there before. You shrug, assuming your roommate must have left it and continue checking your email. Little do you know, that device could contain malicious code designed to infiltrate your computer. USB Rubber Duckies, disguised as regular flash drives, are small hacking tools that can secretly execute commands on your machine. While concerning, they also highlight an important lesson in cybersecurity awareness. By learning how these tools work, you can better protect yourself and even turn the tables by modifying your own flash drive to detect nefarious ones. This guide will teach you how to transform a basic flash drive into your own USB Rubber Ducky to help strengthen your digital defenses.
What Is a USB Rubber Ducky?
A USB Rubber Ducky is a USB drive with specialized design that presents itself to the host computer as a HID (Human Interface Device). It secretly executes keyboard injection attacks rather than storing and transferring data like a typical USB flash drive. In other words, it acts as a keyboard to automatically enter keystrokes and commands that could exfiltrate data, install malware, or do other malicious operations on the host machine.
When the USB Rubber Ducky is inserted into a computer’s USB port, its pre-programmed malicious payloads begin to be executed. The computer doesn’t issue any alerts to the user because it recognizes it as a standard keyboard. The USB Rubber Ducky can also get around the payloads because of how quickly they are executed.
Some examples of what a USB Rubber Ducky can do include:
- Install a remote access Trojan or key logger to gain control of the computer
- Steal browser cookies, passwords, and other data
- Modify system files and the registry
- Launch ransomware to encrypt files and demand payment
The USB Rubber Ducky’s capabilities highlight the dangers of plugging in unknown USB drives and the importance of physical security for computers and networks. If found, a USB Rubber Ducky should not be plugged in and should be reported to the relevant security teams immediately.
Why Use a USB Rubber Ducky for Ethical Hacking?
Using a USB Rubber Ducky for ethical hacking allows you to test the security vulnerabilities of a computer system in a safe and controlled manner.
A USB Rubber Ducky is a specially configured USB drive that, when plugged into a computer, pretends to be a keyboard and automatically runs custom keystroke injection scripts. These scripts are written to test for weaknesses that could allow unauthorized access. The USB Rubber Ducky allows you to assess the security risks of a system by safely simulating an attack.
Some of the benefits of using a USB Rubber Ducky for penetration testing include:
- Identifying vulnerabilities: The USB Rubber Ducky can run scripts to test for weaknesses like poor password policies, unpatched software, or improper file permissions that could be exploited. By discovering these vulnerabilities, you can address them before they are found and exploited by malicious actors.
- Simulating real-world attacks: The USB Rubber Ducky behaves like an actual keyboard, so it can deploy many of the same techniques used in keyboard-based attacks. This helps evaluate how susceptible the system is to such threats that exist in the wild.
- Rapid testing: The USB Rubber Ducky can run through numerous tests quickly to provide an overview of the system’s security posture. More in-depth testing can then be performed as needed.
- Safe and controlled: The USB Rubber Ducky is read-only, so it cannot actually install malware or access data. It simulates attacks without causing any real harm, allowing you to assess risks without damaging the system.
Using a tool like the USB Rubber Ducky is an easy way to start exploring ethical hacking and help strengthen the security of computer systems. When done responsibly, penetration testing with a USB Rubber Ducky can be an extremely valuable exercise.
Required Tools to Make Your Own USB Rubber Ducky
To make your own USB Rubber Ducky, you will need a few essential tools and components.
USB Flash Drive
GB in size to accommodate the payload files. Larger drives, 16 GB or 32 GB, will provide more storage space for various payloads and any additional files.
Microcontroller

A microcontroller, like the PIC18F2550, acts as the brains of the USB Rubber Ducky. It is programmed to emulate a USB keyboard and rapidly send keystroke injection payloads when the drive is plugged in. You will need to procure a microcontroller and flash it with the proper firmware to turn it into a USB Rubber Ducky.
Header Pins
Header pins are required to connect the microcontroller to the USB flash drive. The pins provide a means to attach wiring between the microcontroller and the USB connector on the flash drive.
Wires
Small gage wire is necessary to physically connect the microcontroller to the USB flash drive. The wire transmits signals and power between the two components.
Soldering Iron
A soldering iron allows you to securely attach the header pins and wires to the microcontroller and USB flash drive. You will need a fine-point soldering iron and solder to do delicate work on the small components.
Enclosure (Optional)
An enclosure, like a small project box, provides protection and helps give your USB Rubber Ducky a polished appearance. You will need to modify the enclosure to allow access to the USB connector on the flash drive. An enclosure is not required but helps create a professional looking finished device.
With some basic electronics skills and these necessary tools, you can successfully transform a standard USB flash drive into a fully functioning USB Rubber Ducky ready to carry out your bidding. Be aware that it is against the law and morality to use a USB Rubber Ducky for such things.
Guide to Flashing a Flash Drive Into a USB Rubber Ducky in Steps

You must use the Duck Encoder software to rewrite the firmware on a conventional USB flash drive in order to turn it into a USB Rubber Ducky. “Flashing” the drive is what this procedure is called. You can flash your flash drive by following the procedures below:
- Download the Duck Encoder software. The Duck Encoder is available for download on GitHub. Download the latest release and unzip the file.
- Format your flash drive. Format your flash drive to ensure it has a clean slate to install the Duck Encoder firmware. Connect the drive to your computer and format it using the FAT32 file system.
Run the Duck Encoder Application. Double-Click the “duckencoder.exe” File To Launch the Duck Encoder.
- Select your flash drive. The Duck Encoder will list the USB devices connected to your computer. Select the flash drive you intend to flash from the list.
- Click “Format Drive.” This will erase all data on your flash drive and prepare it to become a USB Rubber Ducky. Confirm you have selected the correct drive, as all data on it will be erased.
- Load payload onto drive. In the Duck Encoder, click “Add Payload” and select a payload file to load onto your USB Rubber Ducky. Payloads are scripts that will run automatically when the drive is plugged into a computer. Multiple payloads can be added.
- Click “Build.” Review all settings and payloads added, then click “Build” to flash your flash drive and turn it into a USB Rubber Ducky. This process typically takes a few minutes. Do not remove the flash drive during this process.
- Test the USB Rubber Ducky. Once the build process completes, test your new USB Rubber Ducky on a computer to ensure the payloads are functioning properly before using on target systems.
Congratulations, you now have your own USB Rubber Ducky ready for use! Be aware of any laws regarding unauthorized access or hacking before using your device. The USB Rubber Ducky can be a powerful tool, so use it responsibly.
Programming Payloads for Your New USB Rubber Ducky
To program your USB Rubber Ducky to perform malicious keystroke injection attacks, you will need to write simple scripts using the Duck Encoder tool. The Encoder allows you to generate payloads compatible with the USB Rubber Ducky that automate keystrokes and mouse clicks when the drive is plugged into a target computer.
Downloading the Duck Encoder
You can download the Duck Encoder for free from Hak5’s website. The tool is available for Windows, Mac OS, and Linux operating systems. Once downloaded, open the application.
Choosing a Payload and Attack
The Encoder offers many pre-written payloads for common attacks like opening a reverse shell, dumping system hashes, or downloading malware. Select a payload from the list based on your intended attack. For example, to open a reverse shell, choose the “ducky-reverse-shell” payload.

Modifying the Payload (Optional)
You can modify the pre-written payloads or write your own script from scratch using the Duck Encoder’s simple scripting language. The language allows you to specify keyboard keys, delays, and mouse clicks. For example, to open a web browser and navigate to a malicious website, you could use:
WINDOWS r
DELAY 1000
STRING chrome.exe
ENTER
DELAY 5000
STRING https://maliciouswebsite.com
ENTER
Compiling the Payload
Once you have selected or written your payload script, click the “Compile!” button. This will convert your script into a binary file compatible with the USB Rubber Ducky. Save this file to your USB drive.
Loading the Payload Onto the USB Rubber Ducky
To load the payload onto your USB Rubber Ducky, simply drag and drop the compiled .bin file onto the drive. The LED light on the Rubber Ducky will flash to indicate the payload has been loaded. Your USB Rubber Ducky is now armed and ready to deploy the malicious payload onto target computers.
Conclusion
You now have the foundation for transforming a USB flash drive into a USB Rubber Ducky. With some basic modifications, you have a powerful pen testing tool at your fingertips. But use it wisely. A USB Rubber Ducky in the wrong hands can be used to infiltrate systems and steal data. However, for educational and authorized pen testing purposes, a USB Rubber Ducky allows you to evaluate how susceptible systems and employees are to malicious USB attacks so you can put appropriate safeguards in place. The USB Rubber Ducky is a sobering reminder of the vulnerabilities that exist if USB security isn’t made a priority. Take what you’ve learned here and build on your knowledge through further research and practice. With this new skill, you have the opportunity to identify and help address USB security risks to keep systems and data protected.


very informative.
Pingback: online medical stores sell tadalafil without medical prescription in india
Pingback: write my social work essay